Adrian Davies
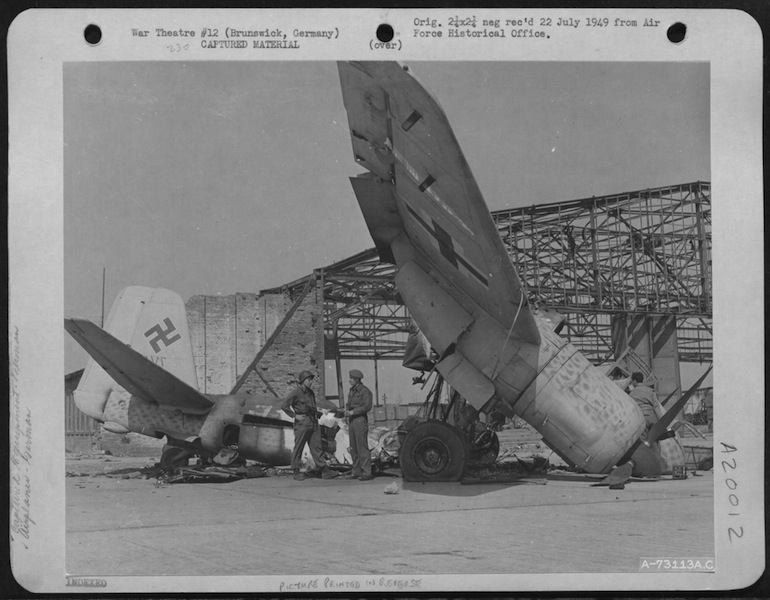
My inspiration for this model came from photographs of a derelict Junkers JU88 G-1 that GIs discovered and photographed in Bernburg, Germany. Retreating Germans destroyed the aircraft. Judging from the lack of radar aerials and exhaust stains, the only time it flew was the altitude of six inches it reached when a hand grenade exploded underneath it.
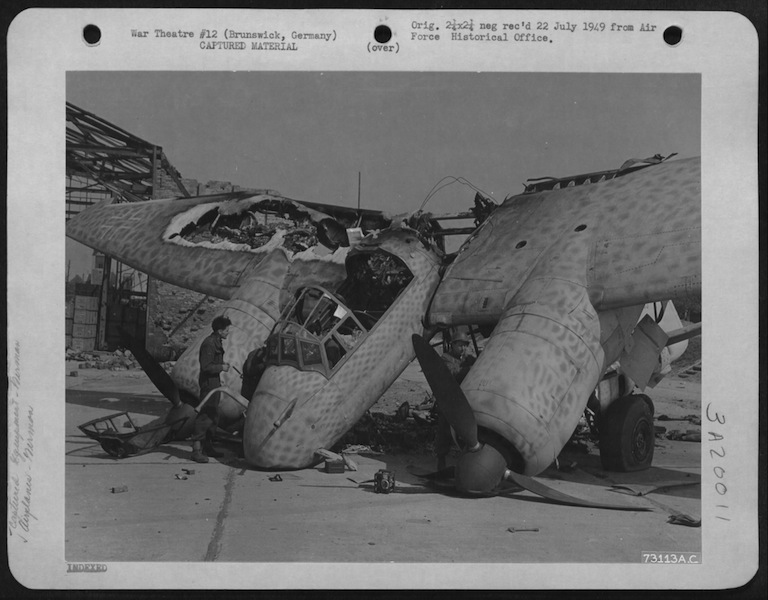
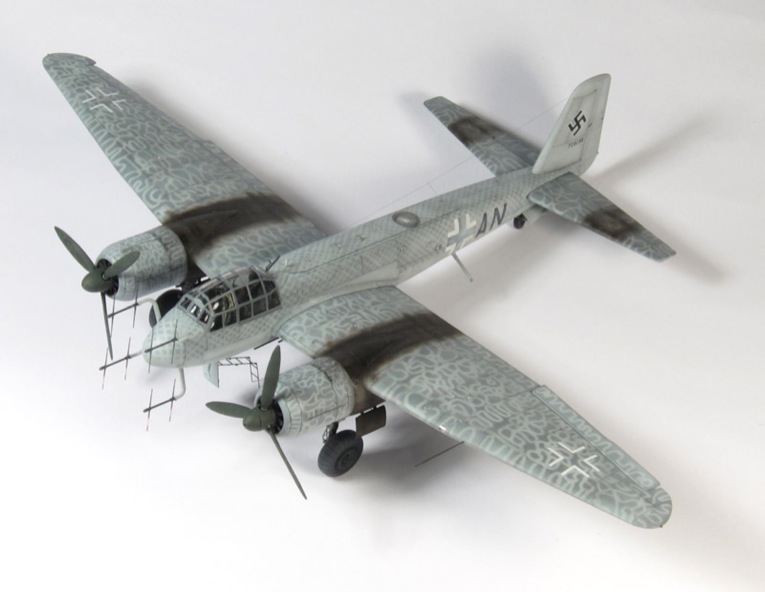
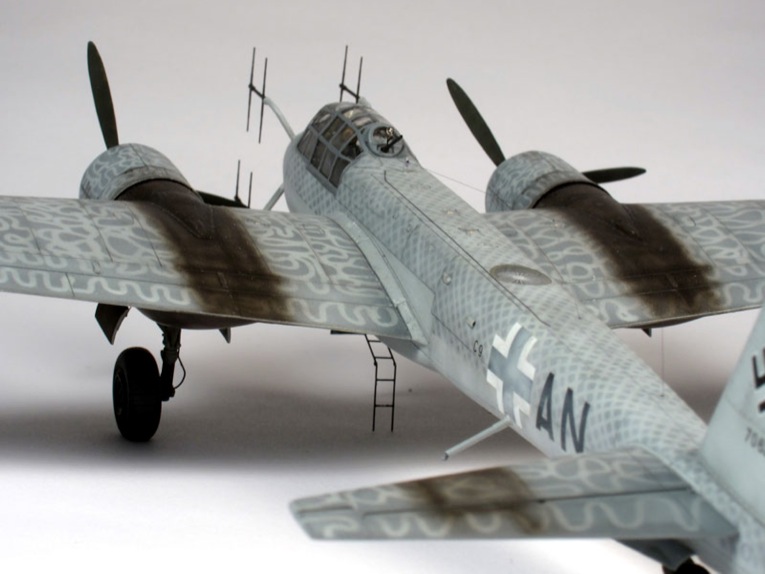
The most fascinating part of this late-build JU88 G-1 is the camouflage. A mixture of Wellenmuster (Wave Pattern) over the wings, engine nacelles and tail planes, and a waffle pattern over the fuselage, I hoped to recreate it in 1/72nd scale.
The Ju88 G-1 is fairly well served in 1/72nd scale, with a recent Hasegawa kit that is unfortunately hard to find. With a little perseverance, I was able to get one on the Internet. To the kit I added a few aftermarket parts and some details of my own.
Construction
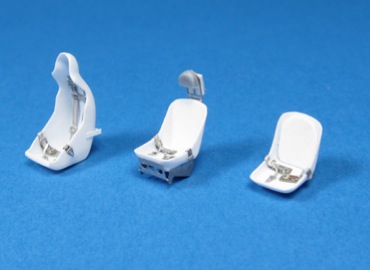
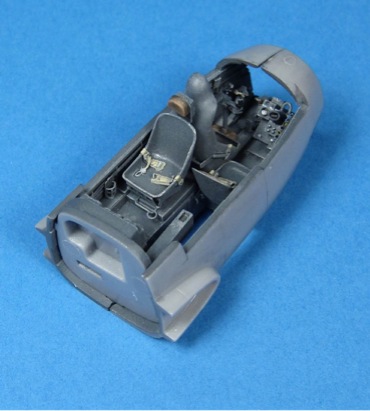
Starting with the cockpit I added some parts from Eduard’s etched brass set and a few scratch built items. To represent properly a late war G-1, the seating arrangement for the radar operator would have to be scratch-built, along with his radar display. I also built new seats for the pilot and radio operator, the pilot’s by vac-forming a new one using the kit seat as a form. The other two were vac-formed over a form carved from a piece of Renshape and detailed. I detailed the side walls and the radio equipment. I painted all using base coats of Tamiya acrylics, washes, dry brushed with Humbrol enamels and details painted with Vallejo acrylics.
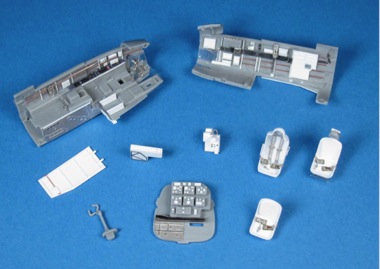
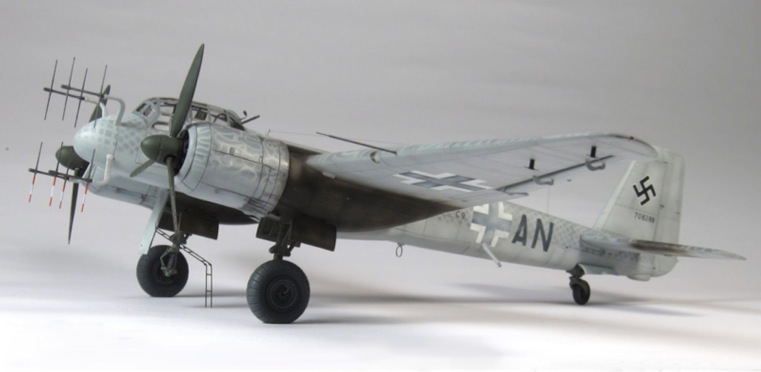
I detailed the undercarriage: a few bolts from punched styrene, etched oleo scissors and some brake lines from fine solder. The tail wheel assembly was similarly detailed, and castor was induced to the strut. The main gear doors came from the Quickboost set after a little modification. The two BMW 801 engines also received some additional detail, with wiring harnesses and some other tubes and pushrods. Unfortunately, with the fans and propellers installed, most of this detail is obscured.
To get this far took no more than a month of a couple of hours each evening, which for me was a flying start. I had hoped to continue at this pace, but the next phase took a little longer. Hasegawa’s JU88 range is excellent, with fine detail and accurate shapes, but it struggles in the amount of components it takes to build the airframe. The fit of the parts is excellent, but it took a lot of time to attend to all those seams and then re-scribe any lost detail. This part of the project was the most labour-intensive. I built a new housing for the PielG6 direction finder, installed the aerial from the Eduard set, with a scratch-built Iron Ferrite coil and cover from thin acrylic sheet. Using clear tape, I installed a new landing light cover to the wings and new intakes for the Kärcher ovens to the leading edges inboard of the engines. The engine nacelles had their bulges removed to better represent the late war BMW “Power Eggs”. I fabricated a new crew access hatch and ladder along with shell ejectors and their openings to the under fuselage cannon.
I did not glue on the tail planes, tail or engine nacelles on at this point, preferring to leave them loose until final assembly. Before I attached and masked the canopy, I added anti-glare curtains and some hand holds to the interior. I masked the rest of the airframe, primed it, checked for mistakes, and primed once more.
Painting
The scheme has two parts: the first is the Wave Pattern over the flying surfaces, a meandering line of RLM 76 light blue painted over a base application of RLM 75 grey violet. The second is the Waffle scheme, a tighter application sprayed as parallel lines in an opposed 45-degree pattern with RLM 76 over RLM 75.
Early on I decided not to attempt to paint either pattern free hand. In 1/72 scale I could get neither the finesse nor the line control to do this successfully. I realised that masking was the way to go. So to begin I painted the whole airframe in RLM 76 custom-mixed from Tamiya acrylics, then weathered using random applications of different shades of the base RLM 76 paint.
After setting away the model to dry thoroughly, I set to work on the masks. I first produced an outline of the wing and tail plane in Adobe Illustrator, and then proceeded to map out the sprayed lines. Whilst doing this I was mindful of how the real aircraft was painted, with the pattern starting at the wingtip, and working towards the wing root. After all the painter would never paint himself into a corner. I also tried to simulate the reach of the painter’s arms. Drawing these in Illustrator was easy, and it allowed me to delete and modify any lines.
I cleaned up the resulting file in Autocad in preparation of it being outputted on a laser cutter which was used to cut the masks out. The material used was a thick paper, which would be rigid yet capable of being formed between finger and thumb to conform to the shape of the wing and still hold its shape. Once this was done, I super-glued small spacers onto the reverse of the masks. They have to be a uniform height to hold the mask off the wing’s surface at a constant distance: 0.040" (1.0mm) evergreen styrene is great for this. With the superglue dry, a tiny drop of water-soluble fabric glue (Sobo here in the States) was placed on each spacer; the mask was then immediately placed on the wing and left until the glue was dry.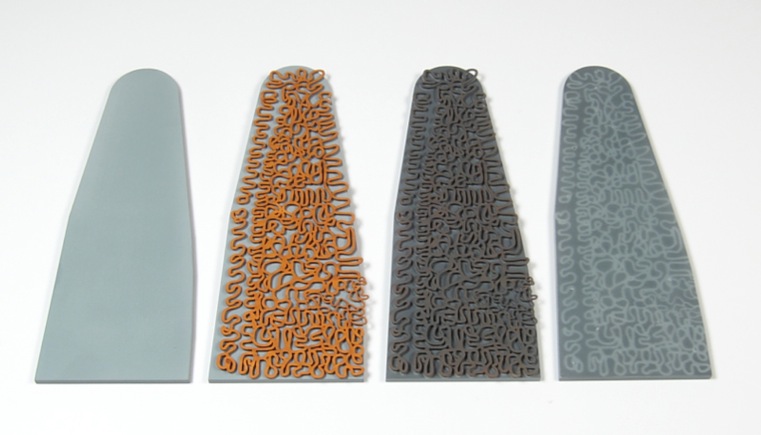
With the pressure set low, I airbrushed a thin mix of the RLM 75 grey violet (created from Tamiya Acrylics) onto the upper surfaces of the wings, tail planes and engines. I kept the airbrush close to the surface and perpendicular to the wing. With a fine spray I gradually built the colour up until I achieved a consistent covering of the grey. This was set aside and allowed to dry.
After removing the masks and any traces of Sobo, I gently rubbed the whole surface with a Scotchbrite pad. At this stage, the contrast between the two greys was a little harsh. So I misted the whole surface with a thinner coat of RLM 76 (1 part paint to 9 parts thinner) to reduce the contrast and also sprayed in local areas to weather the finish.
The fuselage camouflage was achieved using the same technique; the only difference was the formed card mask was held in place not by small styrene spacers, but by a sausage of blue tack along each fuselage side. This also served to mask the demarcation line between the upper and lower colours. Luckily the only compound curve to be found on the 88’s fuselage is the nose; this was masked using strips of tape. Not having the tail or tail planes attached helped the masking process immensely.
I highlighted all the panel lines using a sharp 3H pencil, and then gave the whole model a coat of Future. The decals are from the two AIMS JU88G sheets. I did not know of any unit markings carried by an aircraft wearing this scheme, so I looked at German practices and used markings that looked plausible even if not strictly accurate. Some of the markings were further airbrushed with a light grey overspray to mimic a ground crew’s attempt at further camouflage. The whole model was then top coated with a mixture of Future and Tamiya flat base, not too flat as I’m not a fan of dead flat models. Further weathering was added with Vallejo paints and a silver pencil for chipping.
The BMW 801 was a fairly dirty engine, and that, coupled with the lower quality of late war German aviation fuel, made for an exhaust that was remarkably distinct. So much so that it is possible to identify JU88 G-1s from Allied gun camera footage. Using a very thin mix of black and brown, I gradually built up this staining. Finally I painted the 801’s oil leaks using Gunze Sangyos “oil”, and more stains and dirt with Mig Powders.
Final assembly was very quick. I scratch-built a pitot and various aerials, the underside 20mm cannons (simple brass tube), navigation lights (clear sprue), the FUG 220 dipoles and radio operator’s gun (Schatton Modelbau’s extraordinary turned brass range), and the wireless aerial and dinghy release cable (tippet line).
The finished model has pride of place in my collection and although a challenge, it was a lot of fun to build. I feel that it would be amiss for me not to thank Steve Hustad for his advice on how to replicate the waffle scheme. The use of masks was entirely his idea; I only expanded on it to do the Wave Pattern as well.