By Pat Donahue
Adding detail to your kit by wiring the engine and adding wiring to the cockpit really improves the look of you model and is really pretty easy to do.
I get the wire I use, .012 and .0075 plastic coated wires, at Detail Master (http://www.detailmaster.com). This is wire is what the car guys use to represent spark plug wires for their engines. They come in all kinds of colors, white, black, blue, yellow, red, etc. and are very sturdy and pliable.
For the spark plugs I use .012 white wire with the center metal core stripped out. I insert .0075 wire into the core to make the spark plug lead. Then run the spark plug lead into the ignition ring. I attach all of this with diluted white glue. When dry, I do the final bending and shaping with tweezers or a blunt toothpick.
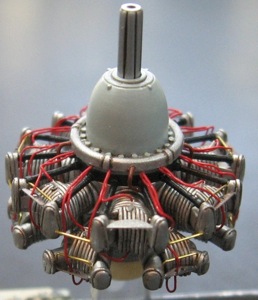
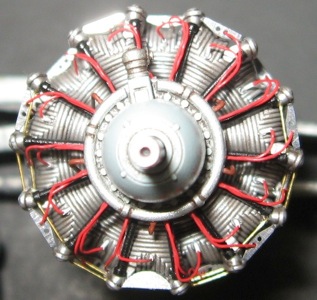
Sometimes I use a bit more artist license than normal as in the case of the 1/48 Nakajima engine from the Tamiya Zero Type 23 kit. The plugs were actually aluminum and the wires were black. With a cowl interior which was painted black I was afraid that there would be very little to see with everything on the engine painted either silver or black hence the use of a bit of color.
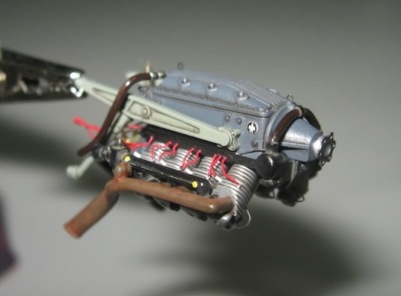
For reference, I have also included a photo of my engine from the 1/48 Tamiya Storch.
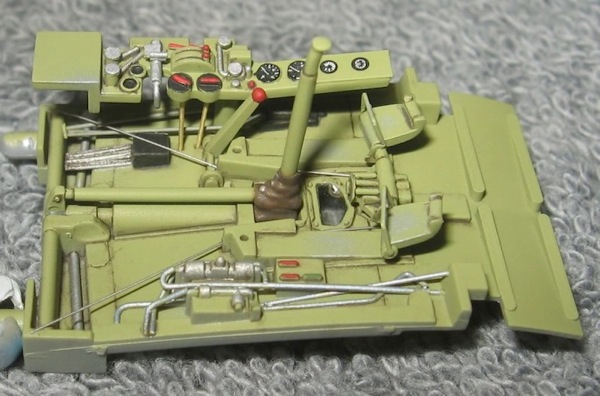
In the cockpit, I use stretched sprue for the hydraulic lines. I find it easier to work with than trying to bend brass wire to fit into all those nooks and crannies. I attach it with Testors liquid cement and paint it with Floquil gunmetal for a nice aluminum look. Control cables are .005 dental wire attached with diluted white glue and left in their natural color. Below is the cockpit for my 1/48 Tamiya Zero Type 23.